Fragment란?
프래그먼트란 액티비티 위에서 화면을 유동적으로 구사해주는 안드로이드의 기법이다.
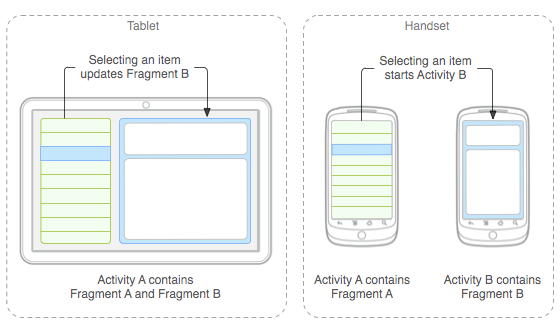
위 그림은 똑같은 앱을 테블릿과 스마트폰에 뛰운 모습이다.
테블릿은 한 화면에 두개의 프레그먼트를 보여주고 스마트폰은 하나의 프래그먼트를 보여준다.
보통 화면전환으로 intent를 이용한 액티비티전환을 많이 배우는데 속도도 느리고 코드관리도 어려와 나온 기능이다.
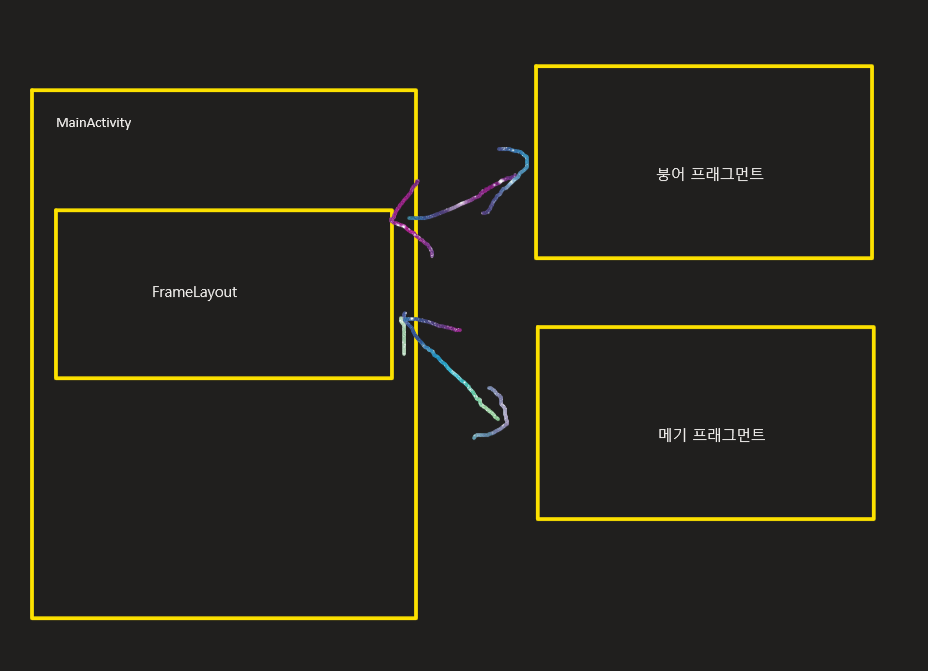
위와같은 그림으로 MainActivity에 프래그먼트가 들어갈 틀을 선언하고 틀 위에 올려놓을 프래그먼트를 여러개 만들어 끼우고 빼고 하는게 가능하다.
그럼 본격적으로 만들어보자
activity_main.xml
<?xml version="1.0" encoding="utf-8"?>
<androidx.constraintlayout.widget.ConstraintLayout xmlns:android="http://schemas.android.com/apk/res/android"
    xmlns:app="http://schemas.android.com/apk/res-auto"
    xmlns:tools="http://schemas.android.com/tools"
    android:layout_width="match_parent"
    android:layout_height="match_parent"
    android:orientation="vertical"
    tools:context=".MainActivity">

    <FrameLayout
        android:layout_width="match_parent"
        android:layout_height="wrap_content"
        android:id="@+id/fragmentFrame"
        app:layout_constraintLeft_toLeftOf="parent"
        app:layout_constraintRight_toRightOf="parent"
        app:layout_constraintTop_toTopOf="parent"/>

    <LinearLayout
        android:gravity="bottom"
        android:layout_width="match_parent"
        android:layout_height="0dp"
        android:orientation="horizontal"
        app:layout_constraintBottom_toBottomOf="parent"
        app:layout_constraintLeft_toLeftOf="parent"
        app:layout_constraintRight_toRightOf="parent">

        <Button
            style="@style/Widget.MaterialComponents.Button"
            android:id="@+id/buttonBounga"
            android:layout_width="match_parent"
            android:layout_height="wrap_content"
            android:layout_margin="5dp"
            android:layout_weight="1"
            android:text="붕어 프래그먼트" />

        <Button
            style="@style/Widget.MaterialComponents.Button"
            android:layout_width="match_parent"
            android:layout_height="wrap_content"
            android:id="@+id/buttonMegi"
            android:layout_weight="1"
            android:layout_margin="5dp"
            android:text="메기 프래그먼트"/>
    </LinearLayout>

</androidx.constraintlayout.widget.ConstraintLayout>
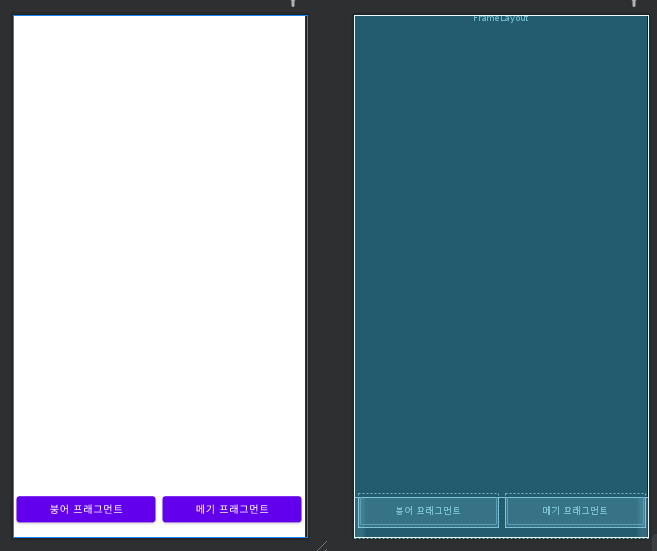
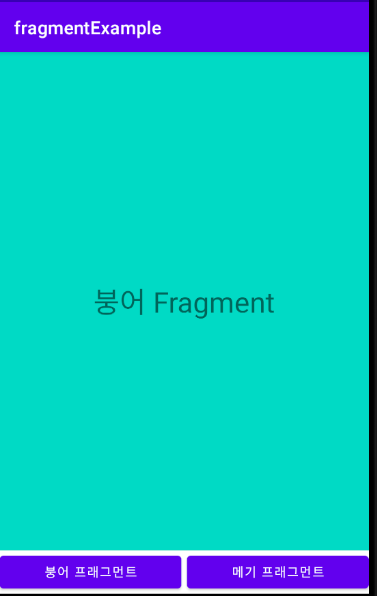
위의 이미지처럼 버튼두개를 만들고 프래그먼트가 들어갈 FrameLayout을 만들었다. 아직 아무 프래그먼트가 들어가지 않았으므로 텅 비어있다.
자 이번에는 붕어 프래그먼트와 메기 프래그먼트를 만들어보자
fragment_bounga.xml
<?xml version="1.0" encoding="utf-8"?>
<androidx.constraintlayout.widget.ConstraintLayout xmlns:android="http://schemas.android.com/apk/res/android"
    xmlns:app="http://schemas.android.com/apk/res-auto"
    android:layout_width="match_parent"
    android:layout_height="match_parent"
    android:background="@color/teal_200">

    <TextView
        android:layout_width="wrap_content"
        android:layout_height="wrap_content"
        android:text="붕어 Fragment"
        android:textSize="32sp"
        app:layout_constraintBottom_toBottomOf="parent"
        app:layout_constraintEnd_toEndOf="parent"
        app:layout_constraintStart_toStartOf="parent"
        app:layout_constraintTop_toTopOf="parent" />

</androidx.constraintlayout.widget.ConstraintLayout>
fragment_megi.xml
<?xml version="1.0" encoding="utf-8"?>
<androidx.constraintlayout.widget.ConstraintLayout xmlns:android="http://schemas.android.com/apk/res/android"
    xmlns:app="http://schemas.android.com/apk/res-auto"
    android:layout_width="match_parent"
    android:layout_height="match_parent"
    android:background="@color/purple_500">

    <TextView
        android:layout_width="wrap_content"
        android:layout_height="wrap_content"
        android:text="메기 Fragment"
        android:textSize="32sp"
        app:layout_constraintBottom_toBottomOf="parent"
        app:layout_constraintEnd_toEndOf="parent"
        app:layout_constraintStart_toStartOf="parent"
        app:layout_constraintTop_toTopOf="parent" />

</androidx.constraintlayout.widget.ConstraintLayout>
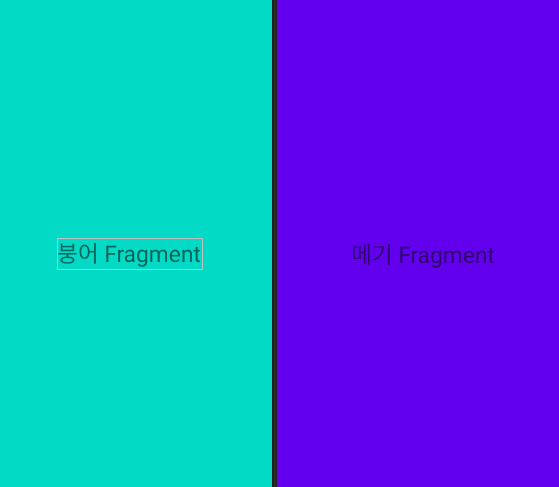
위 두개의 프래그먼트가 FrameLayout에 번갈아가며 나올것이다.
프래그먼트 class 정의하기
프래그먼트를 코드상에서 관리하려면 Fragment 클래스를 상속받으면 된다!!
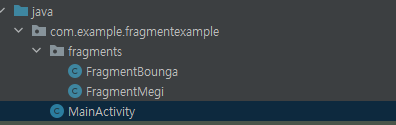
위와 같은 패키지 구조로 프래그먼트 클래스를 정의해주자
여기서 잠깐 Fragment의 생명주기를 보고 갑시다.
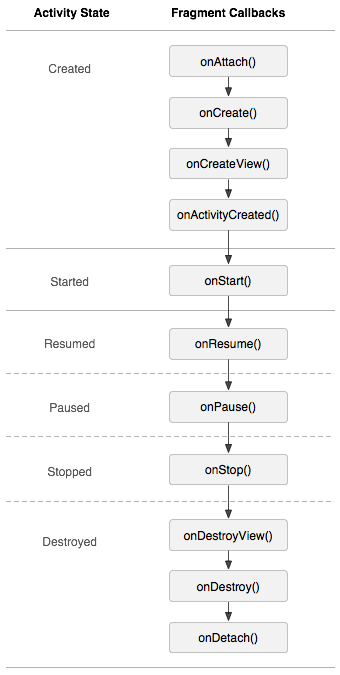
onAttach()
프래그먼트가 액티비티와 연결되어 있었던 경우 호출됩니다(여기에서 Activity가 전달됩니다).
onCreateView()
프래그먼트와 연결된 뷰 계층을 생성하기 위해 호출됩니다.
onActivityCreated()
액티비티의 onCreate() 메서드가 반환할 때 호출됩니다.
onDestroyView()
프래그먼트와 연결된 뷰 계층이 제거되는 중일 때 호출됩니다.
onDetach()
프래그먼트가 액티비티와 연결이 끊어지는 중일 때 호출됩니다.
생명주기는 위 그림을 참고하시구
Fragment 클래스를 상속받으면 onCreateView를 재정의해줍시다.
FragmentBounga.java
public class FragmentBounga extends Fragment {

    @Nullable
    @Override
    public View onCreateView(@NonNull LayoutInflater inflater, @Nullable ViewGroup container, @Nullable Bundle savedInstanceState) {
        return inflater.inflate(R.layout.fragment_bounga,container,false);
    }
}
FragmentMegi.java
public class FragmentMegi extends Fragment {

    @Nullable
    @Override
    public View onCreateView(@NonNull LayoutInflater inflater, @Nullable ViewGroup container, @Nullable Bundle savedInstanceState) {
        return inflater.inflate(R.layout.fragment_megi,container,false);
    }
}
여기서 inflater란 xml을 파싱하여 객체화 시켜주는걸 의미합니다.
여기서 inflate 함수를 분석해봅시다.
 /**
     * Inflate a new view hierarchy from the specified xml resource. Throws
     * {@link InflateException} if there is an error.
     *
     * @param resource ID for an XML layout resource to load (e.g.,
     *        <code>R.layout.main_page</code>)
     * @param root Optional view to be the parent of the generated hierarchy (if
     *        <em>attachToRoot</em> is true), or else simply an object that
     *        provides a set of LayoutParams values for root of the returned
     *        hierarchy (if <em>attachToRoot</em> is false.)
     * @param attachToRoot Whether the inflated hierarchy should be attached to
     *        the root parameter? If false, root is only used to create the
     *        correct subclass of LayoutParams for the root view in the XML.
     * @return The root View of the inflated hierarchy. If root was supplied and
     *         attachToRoot is true, this is root; otherwise it is the root of
     *         the inflated XML file.
     */
    public View inflate(@LayoutRes int resource, @Nullable ViewGroup root, boolean attachToRoot)
resource : 객체화될 프래그먼트 xml을 의미합니다.
root : 객체화될 View의 parent layout을 지정해 주며 선택사항입니다. attachToRoot가 true이면 parent에 객체화된 View를 바로 add 해 버리고, false일 경우 parent 레이아웃의 레이아웃 파라미터만 받아옵니다.
attachToRoot : 부모 ViewGroup에 프래그먼트가 바로 자식으로 들어갈지 말지를 결정합니다.
true로 지정해주면 inflate를 해 주자 마자 바로 루트컨테이너에 add 되어버립니다.
inflate는 객체화의 의미이고 이걸 부품처럼 이곳저곳에 사용하고 싶은데 내 의도와 상관없이 바로 사용되어버리면 곤란하겠죠? false로 해줍시다
FrameLayout에 프래그먼트 올리기
Fragment는 FragmentManager를 통해 관리합니다!!
이 FragmentManager는 싱글톤이라 생성하지 않고 getSupportFragmentManager() 메소드를 통해 얻습니다.
package com.example.fragmentexample;

import androidx.appcompat.app.AppCompatActivity;
import androidx.fragment.app.Fragment;
import androidx.fragment.app.FragmentManager;
import androidx.fragment.app.FragmentTransaction;

import android.os.Bundle;

import com.example.fragmentexample.fragments.FragmentBounga;
import com.example.fragmentexample.fragments.FragmentMegi;


public class MainActivity extends AppCompatActivity {

    private FragmentBounga fragmentBounga;
    private FragmentMegi fragmentMegi;


    @Override
    protected void onCreate(Bundle savedInstanceState) {
        super.onCreate(savedInstanceState);
        setContentView(R.layout.activity_main);

        fragmentBounga = new FragmentBounga();
        fragmentMegi = new FragmentMegi();

        //프래그먼트 매니저 획득
        FragmentManager fragmentManager = getSupportFragmentManager();

        //프래그먼트 Transaction 획득
        //프래그먼트를 올리거나 교체하는 작업을 Transaction이라고 합니다.
        FragmentTransaction fragmentTransaction = fragmentManager.beginTransaction();
        //프래그먼트를 FrameLayout의 자식으로 등록해줍니다.
        fragmentTransaction.add(R.id.fragmentFrame,fragmentBounga);
        //commit을 하면 자식으로 등록된 프래그먼트가 화면에 보여집니다.
        fragmentTransaction.commit();
    }
}
위 코드를 쭉 따라가면 일단 화면에 붕어 fragment가 올라갑니다.
프래그먼트를 올리는 작업을 Transaction이라고 합니다.
프래그먼트 매니저를 얻은뒤 Transaction을 통하여 프래그먼트를 자식으로 등록뒤 commit을 하면 프래그먼트가 화면에 나탑니다.
자 이제 마무리로 버튼까지 구현해봅시다.
package com.example.fragmentexample;

import androidx.appcompat.app.AppCompatActivity;
import androidx.fragment.app.Fragment;
import androidx.fragment.app.FragmentManager;
import androidx.fragment.app.FragmentTransaction;

import android.os.Bundle;
import android.widget.Button;

import com.example.fragmentexample.fragments.FragmentBounga;
import com.example.fragmentexample.fragments.FragmentMegi;


public class MainActivity extends AppCompatActivity {

    private FragmentBounga fragmentBounga;
    private FragmentMegi fragmentMegi;
    private Button buttonBounga;
    private Button buttonMegi;


    @Override
    protected void onCreate(Bundle savedInstanceState) {
        super.onCreate(savedInstanceState);
        setContentView(R.layout.activity_main);

        fragmentBounga = new FragmentBounga();
        fragmentMegi = new FragmentMegi();

        //프래그먼트 매니저 획득
        FragmentManager fragmentManager = getSupportFragmentManager();

        //프래그먼트 Transaction 획득
        //프래그먼트를 올리거나 교체하는 작업을 Transaction이라고 합니다.
        FragmentTransaction fragmentTransaction = fragmentManager.beginTransaction();
        //프래그먼트를 FrameLayout의 자식으로 등록해줍니다.
        fragmentTransaction.add(R.id.fragmentFrame,fragmentBounga);
        //commit을 하면 자식으로 등록된 프래그먼트가 화면에 보여집니다.
        fragmentTransaction.commit();

        buttonBounga = findViewById(R.id.buttonBounga);
        buttonMegi = findViewById(R.id.buttonMegi);

        buttonBounga.setOnClickListener(v -> {
            FragmentManager fm1 = getSupportFragmentManager();
            FragmentTransaction ft1 = fragmentManager.beginTransaction();
            ft1.replace(R.id.fragmentFrame, fragmentBounga);
            ft1.commit();
        });

        buttonMegi.setOnClickListener(v -> {
            FragmentManager fm2 = getSupportFragmentManager();
            FragmentTransaction ft2 = fragmentManager.beginTransaction();
            ft2.replace(R.id.fragmentFrame, fragmentMegi);
            ft2.commit();
        });
    }
}
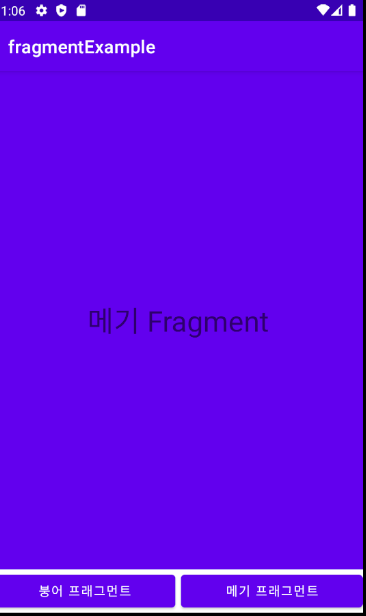
transaction중 replace 메소드를 사용하면 fragment를 원하는것으로 교체 해줄 수 있습니다.
어래와같이 메기 버튼을 클릭하면 메기 프래그먼트로 교체됩니다.
'Android > 안드로이드 기본지식' 카테고리의 다른 글
| 안드로이드 inflate, inflater란? (0) | 2021.07.19 |
|---|---|
| 안드로이드 onSaveInstanceState (0) | 2021.07.08 |
| 안드로이드 ViewModel 사용하기 (0) | 2021.07.08 |
| 안드로이드 LiveData 기본예제 (2) | 2021.07.01 |
| [Android] kotlin에서 안드로이드 Fragment 제거하기 (0) | 2021.06.14 |


댓글